Deploying SolitX container-apps on Microsoft azure
Sign in to the Azure portal
-
Visit the Azure portal.
-
Sign in with Azure account credentials.
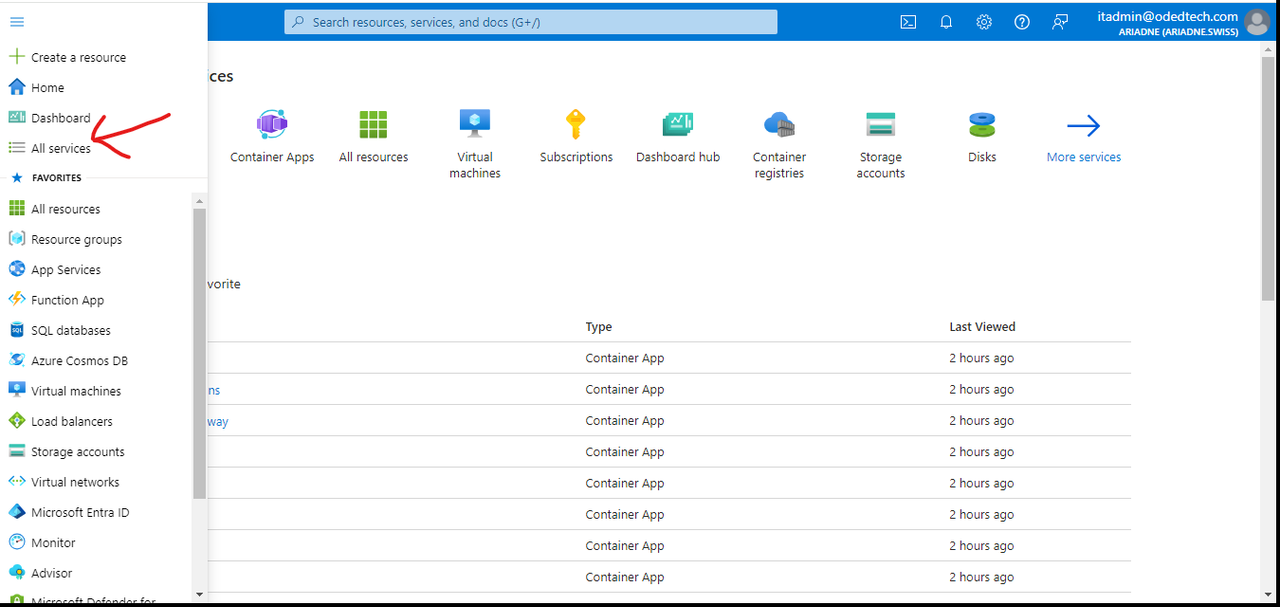
Navigate to "Create a resource"
-
Click on the
Menubutton on the left top corner and selectAll Servicesfrom the list.
-
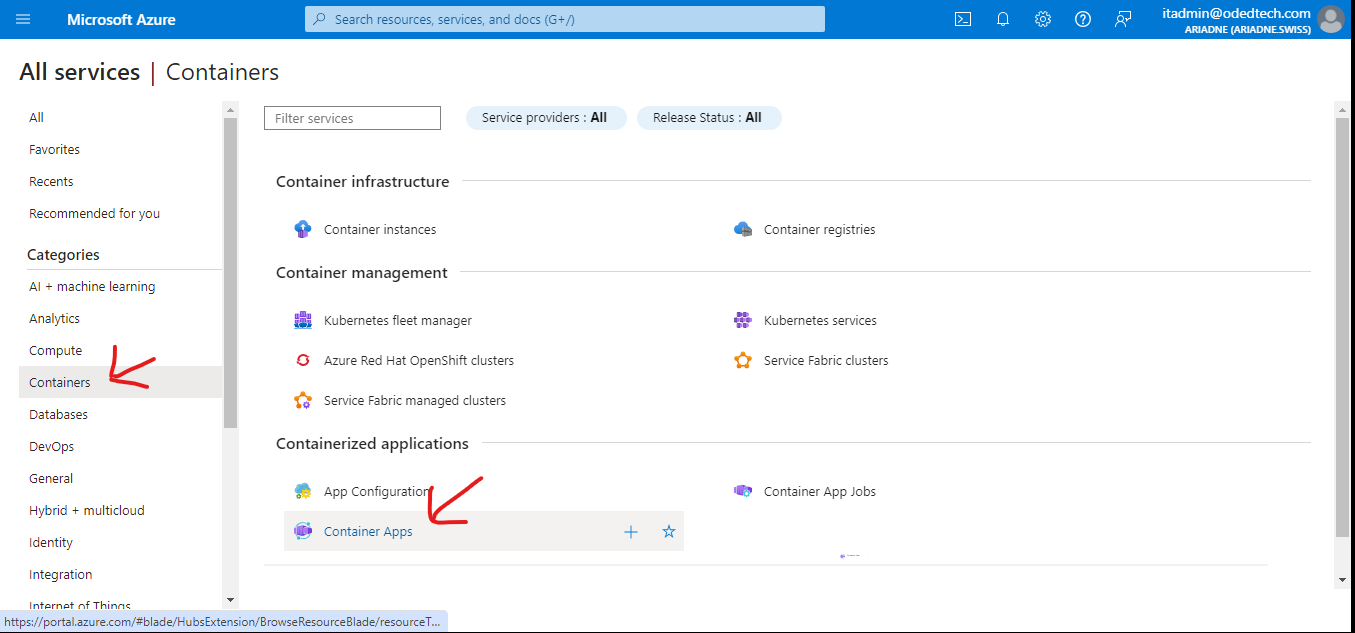
In the
Categoriessection, click onContainerson the left panel and selectContainer Apps.
-
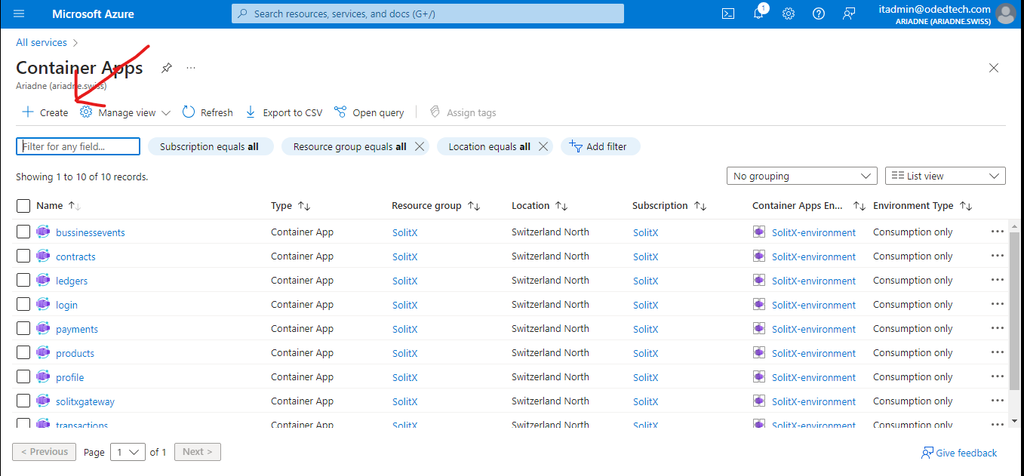
Inside the
Container Appstab, click onCreate.
Create Container App
-
After clicking the
Createbutton, in theBasicssection the project details and container apps environment need to be configured.
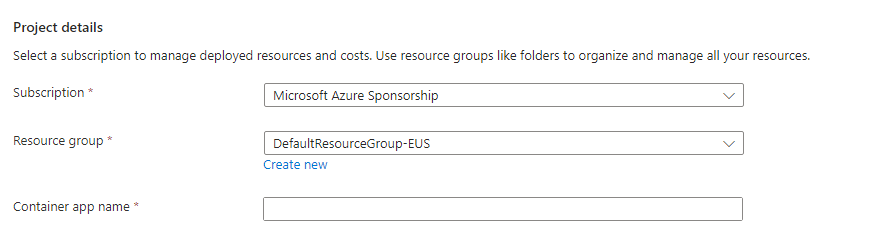
1. Basics
1.1. Project details
-
In the
Subscriptionfield, select the subscription that is to be used to create the container app. -
In the
Resource groupfield, select an existing resource group or create a new one. -
In the
Container appname field, enter a unique name for the container app.
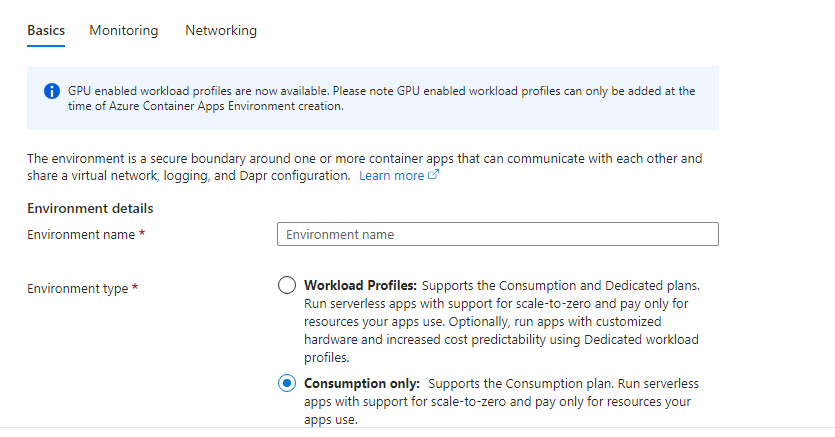
1.2. Container apps environment
-
Select the geographic location where the container app environment is to be deployed. This will determine the latency and cost associated with the app.
-
Select the required container apps environment from the dropdown menu or create a new environment as per the requirement.

Creating a new environment
-
Click on
Create new, enter a unique name for the container app environment. This name will identify the environment within Azure. -
Select the environment type as consumption, so that the charge is levied based on the consumption.
-
If the preferred type is
Worlkload Profiles, then select theWorlkload Profilescheckbox and it must also be configured based on the requirement.
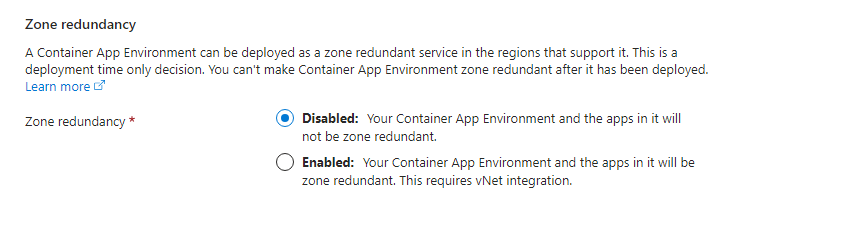
Zone Redundancy
-
The zone redundancy can be disabled or enabled as per the requirements of the user.
-
After the
Basicssection is set up, click onMonitoringtab on the top to start setting up theMonitoringprocess as well.
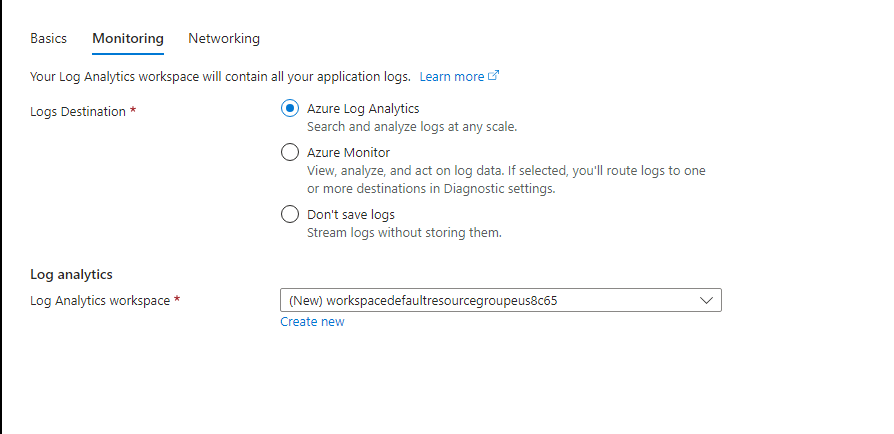
Monitoring
-
Azure Log Analytics (selected in the image):This is the default option, it allows to search and analyze logs at any scale using Azure Monitor. -
Don’t save logs:This option discards the logs after they are streamed. -
Other destinations:This option sends logs to event hubs, storage accounts, or other destinations.
|
If |
-
After the
Monitoringsection is set up, click onNetworkingtab on the top to start setting up theNetworkingprocess as well.
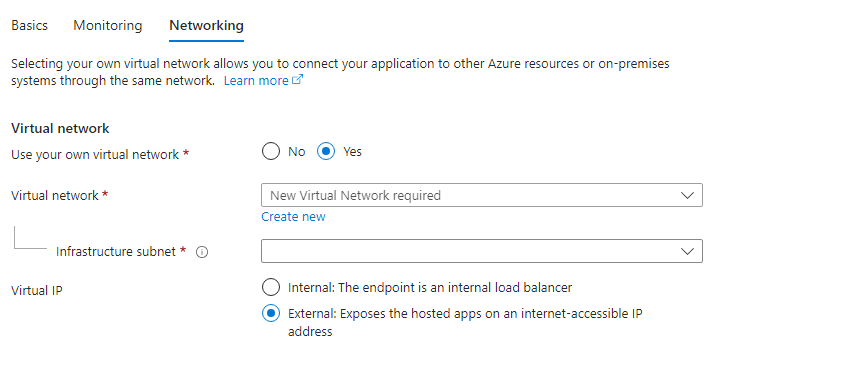
Networking
-
If the user wants to customize their own virtual network, they can select the option
“Yes”. But in the below case it is selected“No”, however , azure creates its own default virtual network.
|
If the user selects |
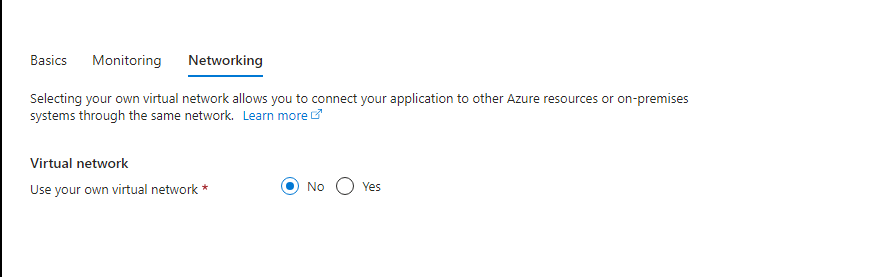
Virtual network customization
-
The user needs to decide whether to integrate the Container App with a virtual network or not. Here are the two options.
-
No (default):This option keeps the Container App in its own isolated virtual network. This might be suitable for simple deployments that don’t require access to other Azure resources or on-premises systems. -
Yes:If the user selectsYes, they will need to configure the following settings.
-
-
Virtual network:Choose an existing virtual network from the dropdown menu. -
Subnet:Select the subnet within the chosen virtual network where the Container App is to be deployed. -
Virtual IP:Here the user can choose between-
Internal:This option creates an internal load balancer. The Container App will be accessible only from within the virtual network. -
External:This option exposes the Container App on a public IP address. The Container App will be accessible from the internet.
-
-
After configuring the
Networking, click onCreateto continue configuration theContainerdetails.
|
Selecting an external virtual IP requires additional configuration like security groups and firewalls to make the container app accessible securely. |
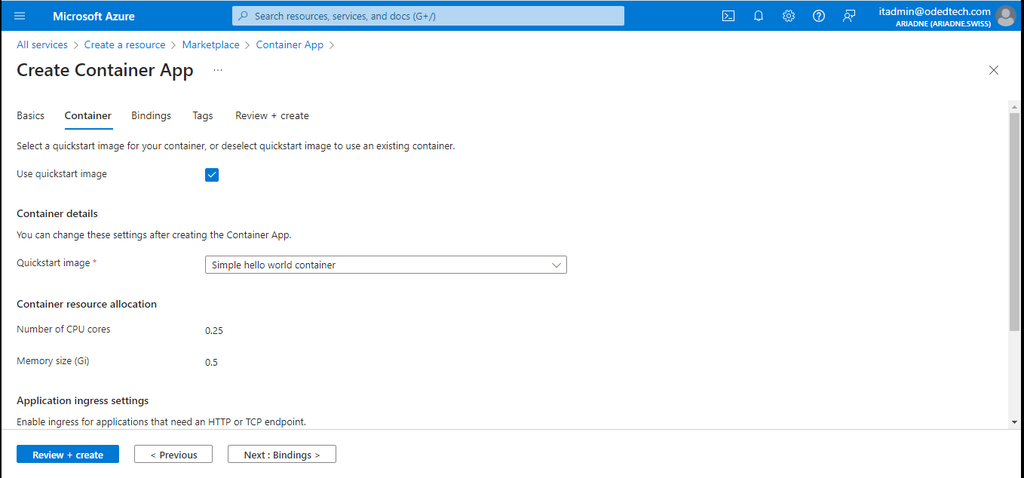
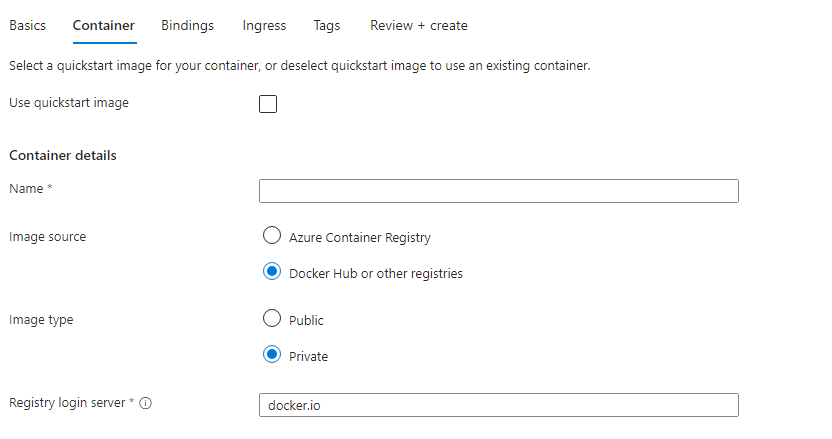
2. Container
-
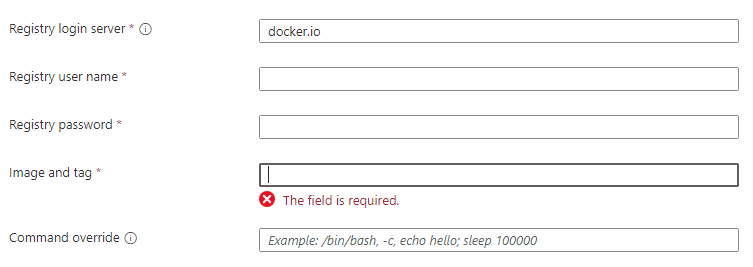
QuickStart image (selected in the image):This allows the user to choose a pre-built container image from Azure Container Registry or Docker Hub for the container app. From the dropdown menu select the required container image.
-
Use an existing container:If a container image is already present in a container registry, theUse quickstart imageoption can be deselected, allowing configuration of the image source and registry details.
-
Registry login server:The user needs to enter the login server address of their Docker image registry. This is the address of the server that hosts the container images. -
Registry username:The user needs to enter their username for the Docker image registry. -
Registry password:The user needs to enter their password for the Docker image registry. -
Image and tag:The user needs to add the details of the docker image and tag required for hosting.

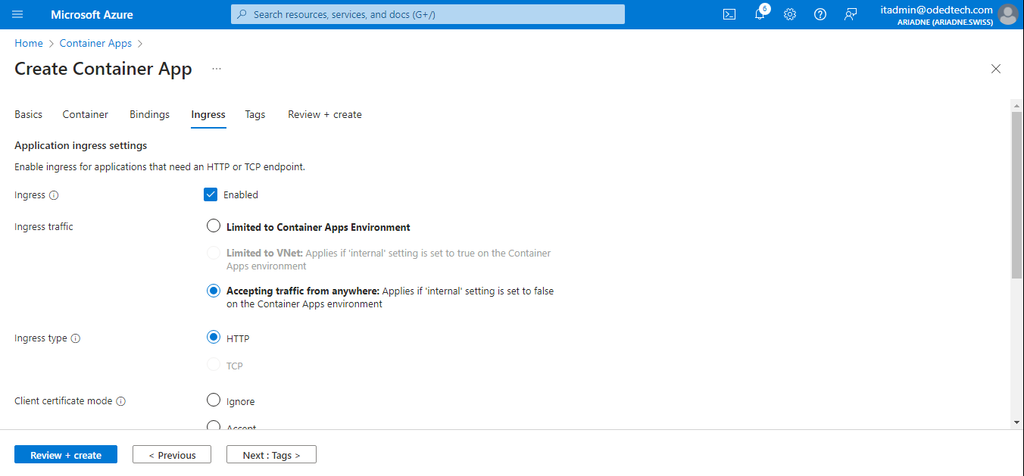
3. Ingress
-
Enable ingress for applications that need an HTTP or TCP endpoint:This checkbox enables or disables ingress for the container app. By default, ingress is disabled. -
Ingress settings:These settings become editable only if the ingress is enabled. -
Here’s what the user can configure
-
Ingress traffic-
Limited to Container Apps Environment:This option restricts the container app access to other apps within the same container apps environment. -
Accepting traffic from anywhere:This option exposes the container app publicly over the internet.
-
-
Ingress type-
HTTP:This option configures ingress for HTTP traffic on port 80. -
TCP :This option configures ingress for TCP traffic on a custom port.
-
-
|
-
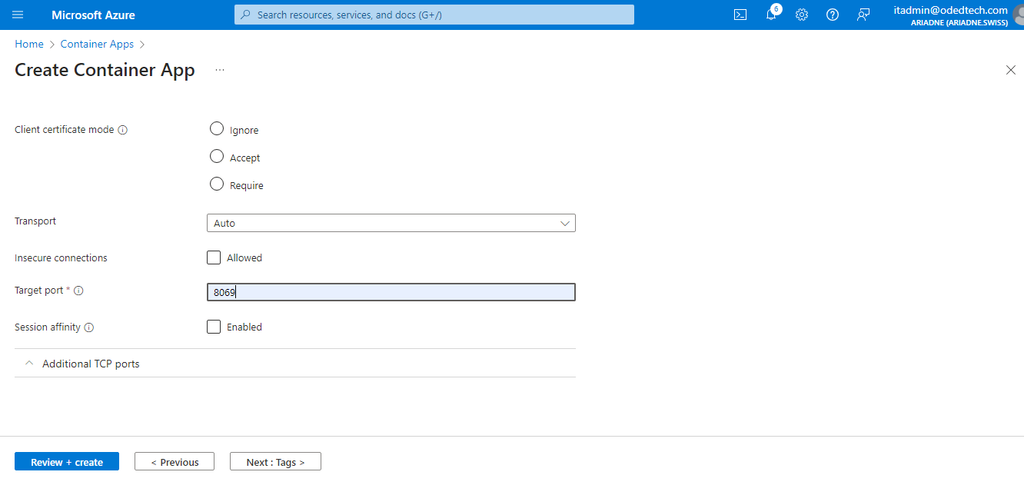
Client certificate mode-
This setting is used to configure how the container app authenticates clients using client certificates. Here are the options
-
Ignore:This option specifies that client certificate authentication is not required for the container app. -
Accept:This option allows clients with valid certificates to access the container app. -
Require:This option mandates client certificate authentication for all requests to the container app.
-
-
-
Transport-
This setting determines the transport protocol used by the container app to communicate with clients. The image shows
Auto (selected)as the option, which means the container app will automatically negotiate between HTTP/1.1 and HTTP/2 based on the client’s capabilities.
-
-
Insecure connections-
This setting allows or disallows insecure connections (HTTP) to the container app.
-
-
Target port-
This text box requires the user to enter the port number on which the container app listens for incoming traffic. The value must not be empty.
-
-
Session affinity-
This option enables or disables session affinity for the container app. Session affinity ensures that a user session remains on the same container instance throughout their interaction with the app. The image shows
Disabled, which means session affinity is disabled.
-
-
Additional TCP ports-
This section allows the user to configure additional TCP ports for the container app. However, the image shows a note stating that additional TCP ports can only be configured if
-
The app itself is set as external.
-
The container app is using a custom virtual network.
-
At most five additional TCP ports are allowed for each app. If additional ports are needed, the user should open a support request.
-
-
-
After configuring the
Ingress, click onTagssection on the top to continue configuration theTagssettings.
4. Monitoring the resources of container-apps
-
Monitoring the resources of containerized applications in Azure involves tracking various performance metrics and logs to ensure the applications are running smoothly and efficiently.
4.1. Navigate to monitoring section
-
From the
Container Appssection, select the required container app that is to be monitored. -
From the left side panel, in the
Monitoringsection, click onMetricsto open the details and usage of the specific application based on the selected time or the last 24hrs by default. -
The monitoring can be viewed based on the required
metric,scope,metric namespaceor theaggregationselection.
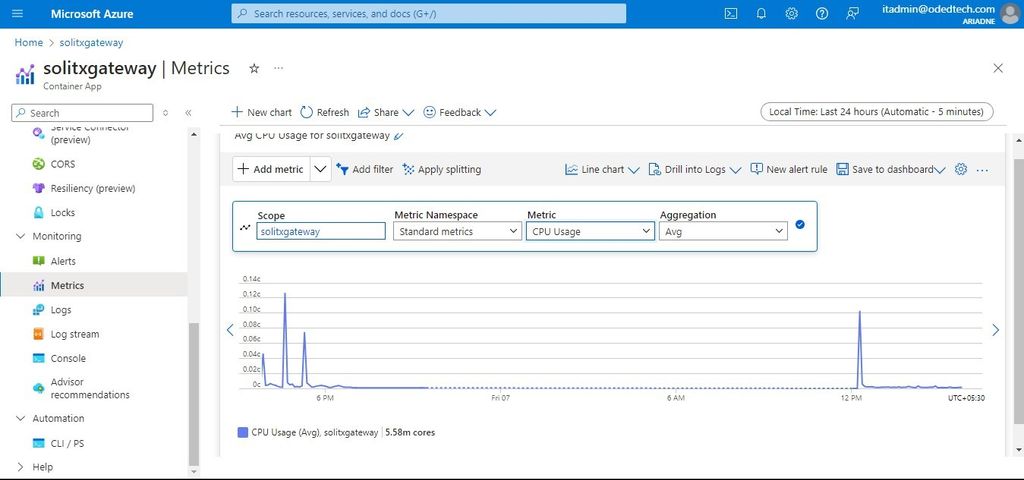
4.2. Monitoring CPU usage
-
The metric
CPU Usagemeasures the amount of CPU time that the processes within a container are consuming. -
In the below graph, the metrics of the CPU usage for the last 24hrs can be seen by selecting
CPU Usagefrom theMetricdropdown.
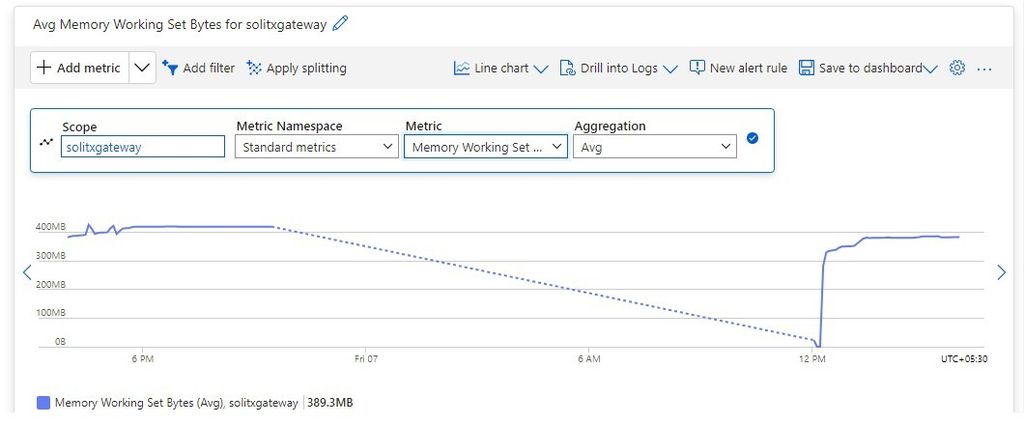
4.3. Monitoring memory usage
-
The
Memory Working Set Bytesmetric measures the amount of physical memory (RAM) that is being used by a container or a process within a container. -
In the below graph, the metrics of the memory usage for the last 24hrs can be seen by selecting
Memory Working Set Bytesfrom theMetricdropdown.
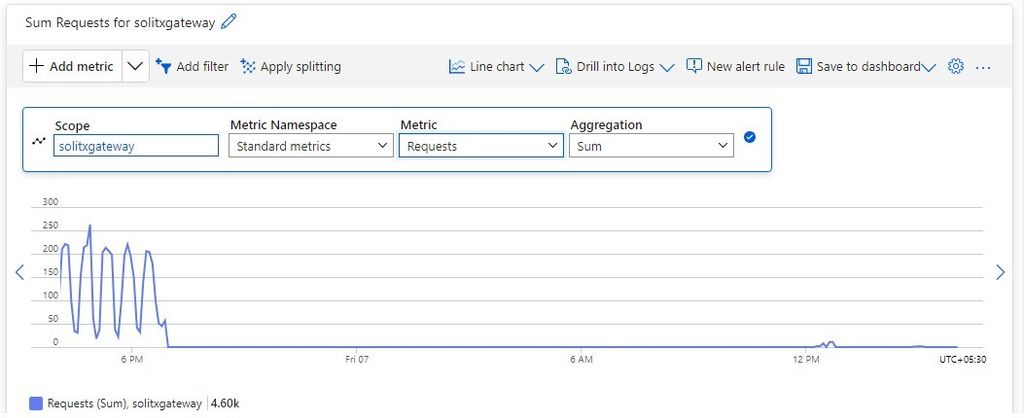
4.4. Monitoring requests
-
The
Requestsmetric measures the number of HTTP requests received by the containerized application over a specific period. This metric can provide insights into the overall load on the application, the distribution of requests over time, and the success or failure rates of those requests. -
Below image shows the graph containing the number of requests based on the selected time interval.
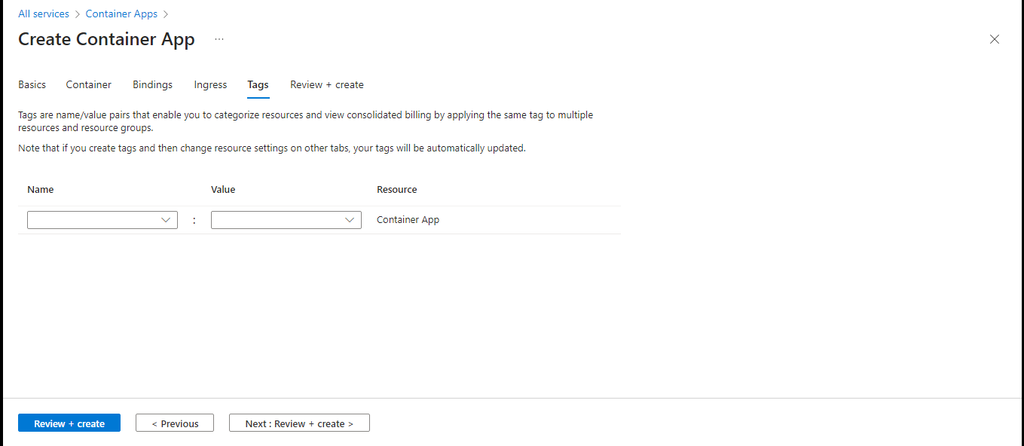
5. Tags
-
Name:Enter a name for the tag. Tag names must use letters, numbers, spaces, underscores, hyphens, equal signs, and colons (example: "department: engineering"). -
Value:Enter a value for the tag. Tag values can be any string (example: "Seattle").
6. Review + create
-
After configuring the
Tags, click onReview + createsection on the top to review and click onCreateto create the container app. -
Tabs marked with a red dot indicate the presence of errors. Upon encountering errors, navigation to the appropriate tab is recommended. In said tab, fields containing errors will be highlighted in red. Once corrections to all errors have been made, select Review and create again.

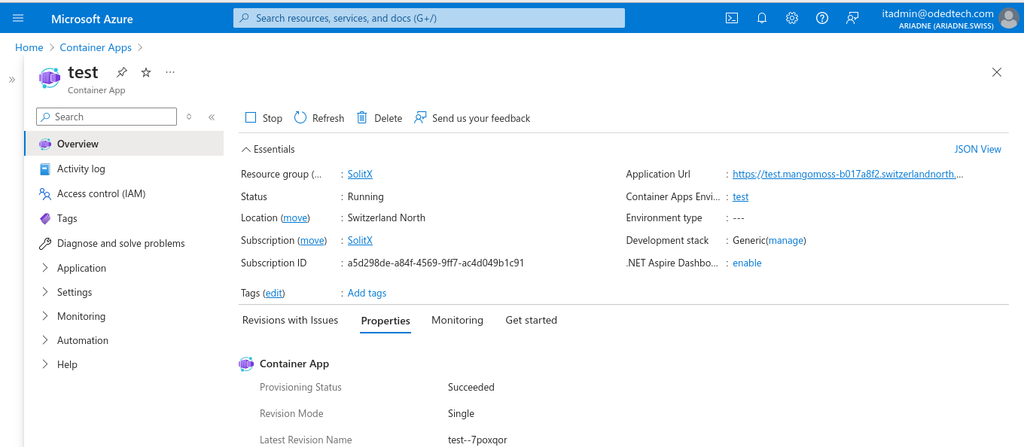
Overview
-
A page with the message
Deployment is in progressis displayed. Once the deployment is successfully completed, a message:Your deployment is completeis shown. -
Select
Go to resourceto view your new Container Apps job. -
By clicking the name of the container app, the
Overviewof the newly created container app is shown.