Creation of Virtual Machine (VM)
Sign in to azure portal
-
Visit the Azure portal.
-
Sign in with your Azure account credentials.
Create virtual machine
-
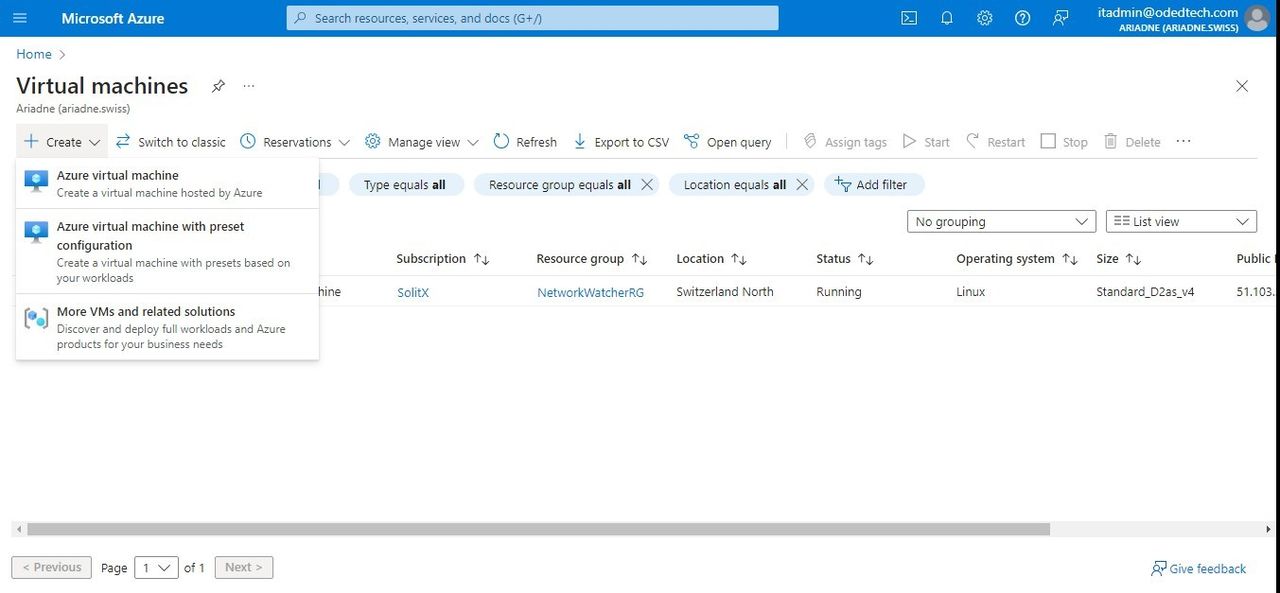
Enter
virtual machinesin the search. -
Under
Services, selectVirtual machines.
-
In the
Virtual machinespage, selectCreateand thenVirtual machine. TheCreate a virtual machinepage opens.
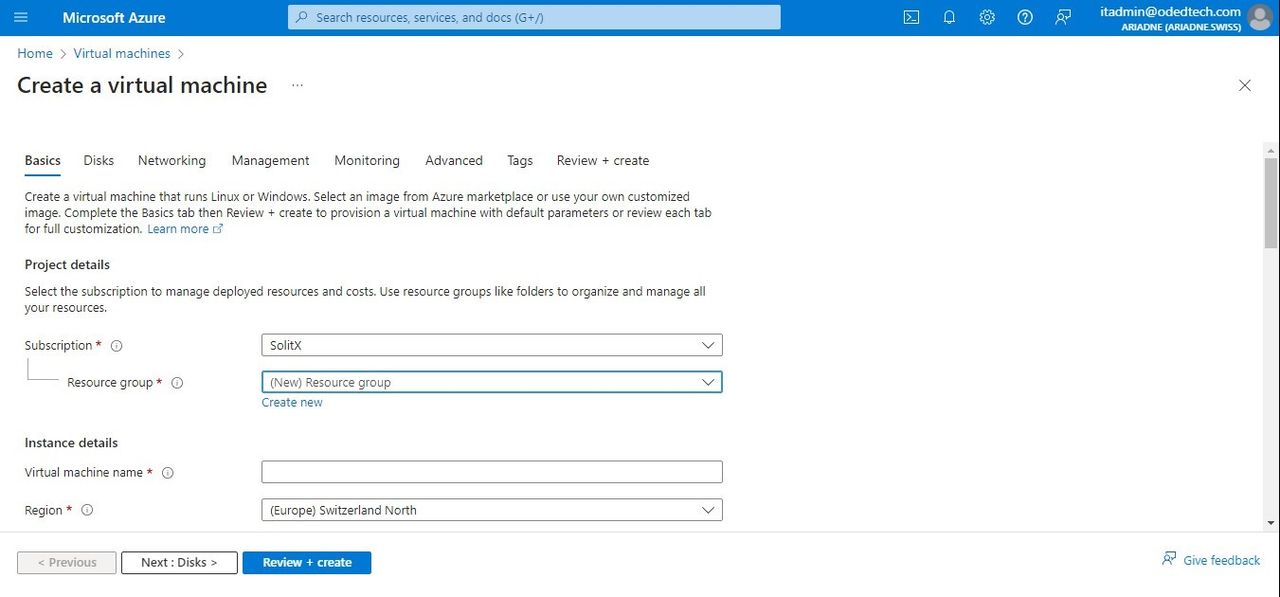
1. Basics
1.1. Project details
-
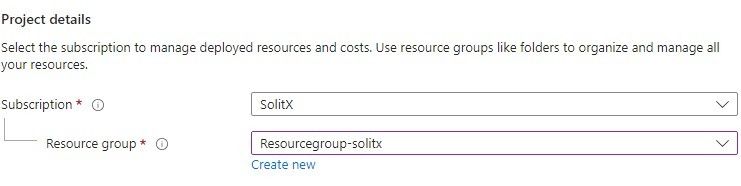
In the
Basicstab, underProject details, make sure the correct subscription is selected and then choose toCreate newresource group. Enter a name for the resource group.
1.2. Instance details
-
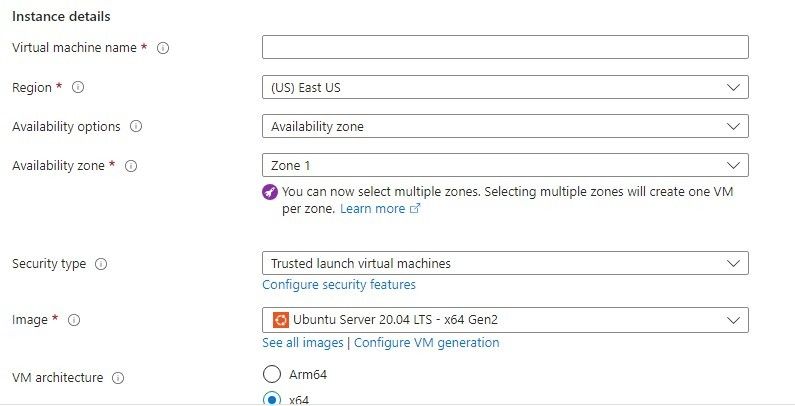
Under
Instance details, enter a name for theVirtual machine name, and choose an image for yourImagesection. Leave the other defaults. The default size and pricing is only shown as an example. Size availability and pricing are dependent on the region and subscription.
|
Some users will see the option to create VMs in multiple zones. Azure availability zones are physically separate locations within each Azure region that are tolerant to local failures. Use availability zones to protect the applications and data against unlikely datacenter failures. |
2. Networking
-
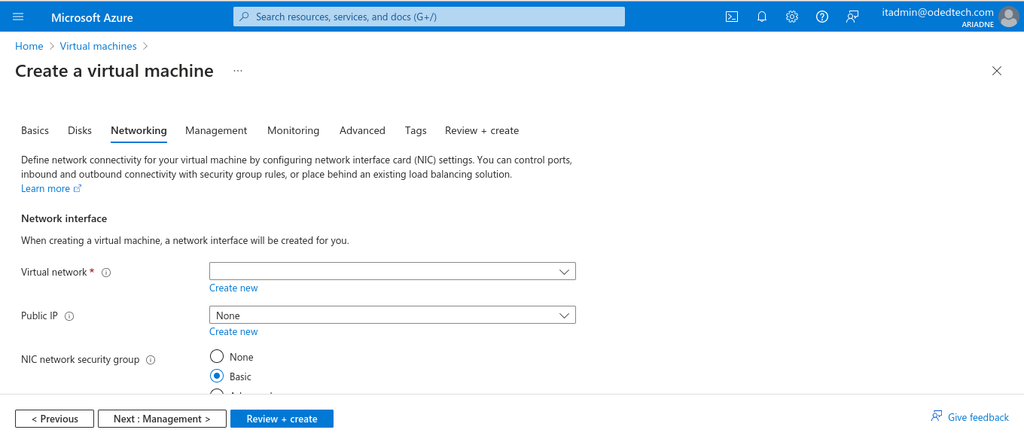
In the
Networkingsection, the virtual network creation is mandatory to create a virtual machine.
2.1. Creating virtual network
-
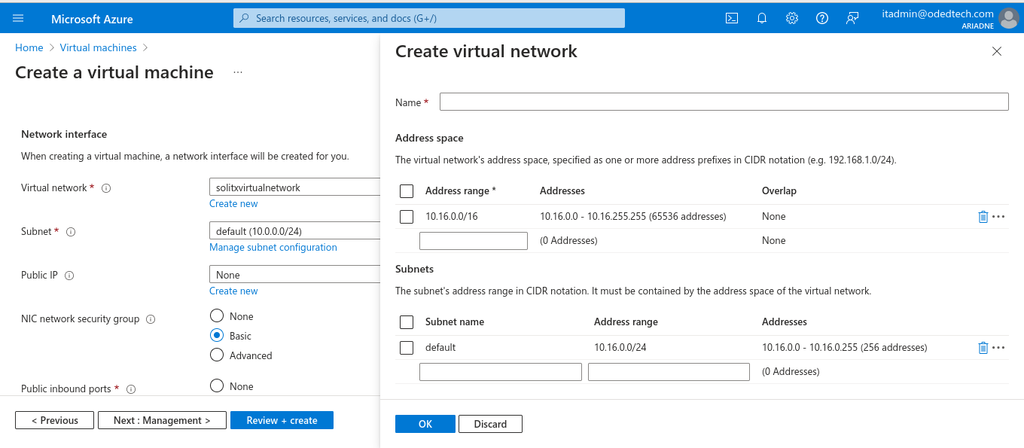
So, in order to create a virtual network, go to
Networkingsection on the top and click onCreate newunder theVirtual network *section.
|
A virtual network is a distinct network environment for Azure resources. It’s like a private network in a datacenter. VMs deployed in a virtual network can communicate with each other using private IP addresses. Creation of a virtual network can be done before creating a virtual machine, or during the VM creation process. |
-
On the
Create virtual networkpage, fill in the following information-
Name:Enter a name for the virtual network. -
Address space:Enter the address space for the virtual network in CIDR notation (e.g., 10.0.0.0/16) or select from the list of addresses. -
Subnets:Optionally create one or more subnets for the virtual network. A subnet is a range of IP addresses within a virtual network. VMs deployed in the same subnet can communicate with each other using private IP addresses.
-
3. Review + create
-
Leave the remaining defaults and then select the
Review + createbutton at the bottom of the page. -
On the
Create a virtual machinepage, the details about the VM, which is about to be created, can be seen. Review the settings and selectCreate.

-
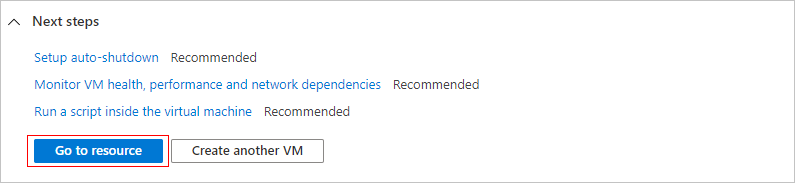
When the deployment is finished, select
Go to resource.
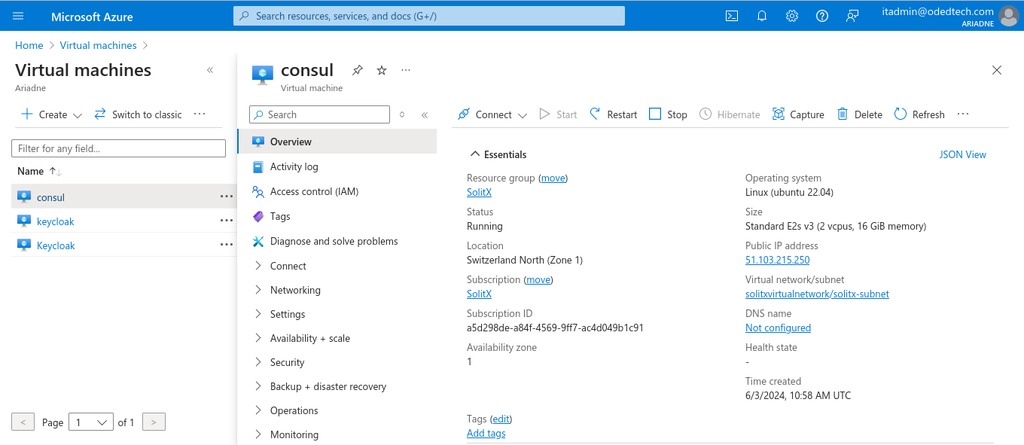
Overview
-
On this page, the overview of newly created virtual machine can be seen.