Tech stack
1. Languages and tools
Java
-
Java is a high-level, object-oriented programming language known for its portability, security, and robustness.
-
The code samples and examples provided in this documentation are written in Java.
Spring Tool Suite (STS)
-
Spring Tool Suite (STS) is an eclipse-based development environment tailored for developing Spring applications.
-
It provides a comprehensive set of tools for Java developers, including features for rapid application development, debugging, testing, and deployment.
Features of STS
-
Spring boot integration for easy project setup and configuration.
-
Built-in support for Maven and Gradle build systems.
-
Code assistance and navigation for spring-specific annotations and configurations.
-
Integrated debugging tools for efficient troubleshooting.
-
Seamless deployment capabilities for deploying spring applications to various environments.
System requirements
-
Operating system: Windows, macOS, Linux
-
Java Development Kit (JDK): Version 17 (or higher)
-
Minimum RAM: 2 GB (4 GB recommended)
-
Disk space: 500 MB for STS installation, additional space for projects
Installation
-
Download the latest version of Spring Tool Suite (STS) 4.16 from the official website.
-
Follow the installation instructions provided for your operating system.
-
Launch STS and configure any additional settings as needed.
2. Project structure
2.1. Package structure
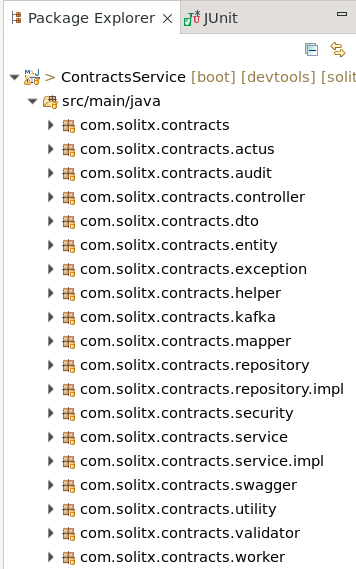
Controller layer
-
It will contain Rest APIs definition and request body.
-
Only API calls should invoke the Controller Layer.
Service layer
-
It will only take the data from the controller layer and transfer it to the repository layer.
-
It will also contain business logic and model the data for the repository layer.
-
It will also take the data from the repository layer and send it back to Controller Layer.
-
Only the Controller layer should invoke the Service Layer.
Repository layer
-
It will interact with the underlying database.
-
The service Layer should only invoke the repository layer.
Entity
-
An entity represents a single instance of your domain object saved into the database as a record. It has some attributes that we represent as columns in our tables.write the validation logic relative to the input’s value to check.
DTO
-
DTOs (Data Transfer objects) are the objects or classes used to transfer data between layers through the service layer.
-
The service layer only accepts data in the form of DTOs.
-
Any data returned to the controller layer will be in the form of DTOs.
Mapper
-
Mappers are used to converting the form of data when transferred between layers. There are two types of Mappers:
-
Model Mapper: This will map any data to the Model.
-
DTO Mapper: This will map any data to DTOs.
-
Validator
-
Write the validation logic relative to the input’s value to check.
Exception
-
Handle the specific exceptions and sending the custom responses to the client.
Utility
-
A utility class in Java is a class that provides static methods that are accessible for use across an application. The static methods in utility classes are used for performing common routines in our application.
-
Utility classes cannot be instantiated and are sometimes stateless without static variables. We declare a utility class as final, and all its methods must be static.
Helper
-
A helper class provides functionalities necessary for the overall running of a Java program. Helper classes contain methods used by other classes to perform repetitive tasks, which aren’t the core purpose of an application.
-
As the name suggests, they help other classes by providing some functionalities that complement the services provided by those classes.
-
They contain methods for implementing mundane and repetitive tasks, making the overall code base modular and reusable across multiple classes.
-
A helper class can be instantiated and may contain instance variables, instance, and static methods.
-
Multiple instances of a helper class can exist in our application. When different classes have common functionalities, we can group these functionalities together to form a helper class that’s accessible across certain classes in our application.
|
Want to dive deep into the differences between utility and helper classes. |
2.2. Coding standards
Basic checks
-
Classes : Class names should start with uppercase letter and if it contains multiple words, then every inner word should start with uppercase.
Example:Oded,OdedTech
-
Methods : Method names should start with lowercase letter and if it contains multiple words, then every inner word should start with uppercase.
Example:oded(),odedTech()
-
Variables : Variable names should start with lowercase letter and if it contains multiple words, then every inner word should start with uppercase. Variable names should be relatable.
Example:name,fatherName,mobileNumber
-
Interfaces : Interface names should start with uppercase letter and if it contains multiple words, then every inner word should start with uppercase.
Example:Runnable,Collection
Properties or environment
-
Properties or environment variables should not be hardcode and must be declared in “properties” file. Because these values change according to the environment.
-
Integrating with a vault is a common practice for securely managing sensitive information such as passwords, API keys, encryption keys, and other credentials.
-
A vault serves as a centralized repository for storing and managing these secrets.
|
|
Package names
-
Package : Package names should be in lowercase letters, without any spaces between letters, and must follow proper structure.
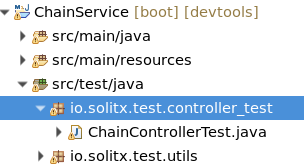
Test cases
-
JUnit test cases should be written for every API implemented in the project. These test cases should reside in the
src/test/javapackage.
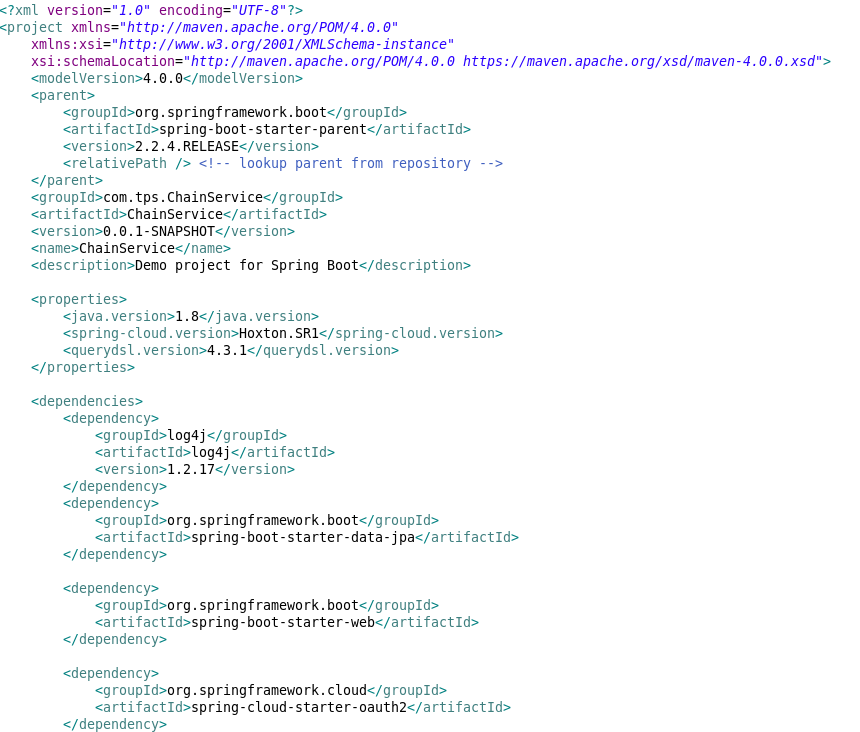
Dependencies
-
Dependencies in pom.xml should be well structured and clean.
Points to remember
-
In a spring or spring boot application, this sequence should be followed: controller → service → serviceImpl → repository → repositoryImpl.
-
DAO, DAOImpl, and model classes should be used according to requirements.
-
In controller classes, excessive business logic should be avoided. If extensive business logic is necessary, it should be placed in helper classes.
-
If any logic or methods are applicable throughout the project, they should be incorporated into utility classes.
-
Code committed to repositories should be free of sysouts, unused code, unused variables, and other unnecessary clutter.
-
It should be clean and structured in a organized format.
3. Core dependencies
-
log4j (version 1.2.17)
-
Purpose: Logging framework for generating log messages.
-
Usage: Logging information, warnings, errors, etc. during application execution.
-
-
spring-boot-starter-oauth2-resource-server
-
Purpose: Starter for configuring OAuth 2.0 Resource Server support in Spring Boot applications.
-
Usage: Securing API endpoints and validating OAuth 2.0 access tokens.
-
-
spring-cloud-starter-vault-config
-
Purpose: Starter for integrating Spring Cloud applications with HashiCorp Vault for configuration management.
-
Usage: Retrieving sensitive configuration properties securely from Vault.
-
-
postgresql (runtime)
-
Purpose: PostgreSQL JDBC driver for connecting to PostgreSQL databases.
-
Usage: Establishing database connections and executing SQL queries.
-
-
spring-boot-starter-data-jpa
-
Purpose: The spring-boot-starter-data-jpa dependency provides starter support for building Spring Boot applications with Java Persistence API (JPA) and Hibernate. It includes all necessary dependencies and configurations to set up JPA-based data access in a Spring Boot application effortlessly.
-
Usage: Develop Spring Boot applications that interact with databases using JPA for object-relational mapping. Implement persistence layers, entities, repositories, and data access logic leveraging JPA’s capabilities and Hibernate as the underlying ORM provider.
-
-
spring-boot-starter-web
-
Purpose: The spring-boot-starter-web dependency offers starter support for developing web applications with Spring Boot. It includes essential dependencies and configurations for building web applications, such as embedded Tomcat, Spring MVC, and Jackson for JSON processing.
-
Usage: Develop web applications using Spring MVC framework, handle HTTP requests and responses, implement RESTful APIs, serve static content, and utilize features like content negotiation, validation, and error handling provided by Spring Boot’s web support.
-
-
spring-boot-starter-test
-
Purpose: The
spring-boot-starter-testdependency provides starter support for writing unit and integration tests in Spring Boot applications. It includes various testing frameworks and libraries for testing Spring Boot applications, such as JUnit, Mockito, AssertJ, and Spring Test. -
Usage : Write unit tests for Spring components (controllers, services, repositories, etc.) using JUnit and Mockito.
-
-
spring-cloud-starter-bootstrap
-
Purpose: The spring-cloud-starter-bootstrap dependency serves as a starter for configuring and initializing Spring Cloud applications. It provides essential features for setting up distributed systems and microservices architectures, including centralized configuration management, dynamic property resolution, and environment bootstrap.
-
Usage: Integrate Spring Cloud Bootstrap with your Spring Boot applications to enable centralized configuration retrieval from distributed configuration sources like Spring Cloud Config Server or external configuration providers (e.g., Git repository, Vault). Use it to bootstrap Spring Cloud applications, manage configuration properties, and ensure consistency across microservices within a distributed system.
-
-
spring-boot-starter-validation
-
Purpose: The spring-boot-starter-validation dependency provides starter support for validation in Spring Boot applications. It includes dependencies required for integrating and utilizing the validation framework provided by the Java Bean Validation API (JSR 380) and Hibernate Validator.
-
Usage: Implement validation logic in Spring Boot applications to enforce constraints on data inputs and ensure data integrity. Utilize annotations such as @NotNull, @Size, @Pattern, etc., to define validation rules on domain objects, DTOs (Data Transfer Objects), and request payloads. Leverage Spring Boot’s integration with Hibernate Validator to automatically validate incoming data and handle validation errors efficiently.
-
-
springdoc-openapi-starter-webmvc-ui(version 2.0.2)
-
Purpose: The springdoc-openapi-starter-webmvc-ui dependency aims to facilitate the integration of Swagger UI with Spring Web MVC applications.
-
Usage: Used to automatically generate API documentation and expose it via a user-friendly Swagger UI interface within their Spring Web MVC applications.
-
-
lombok
-
Purpose: The
lombokdependency simplifies Java development by providing annotations that automatically generate boilerplate code, such as getters, setters, constructors, and toString methods. -
Usage: Use to annotate Java classes with
lombokannotations to reduce the amount of boilerplate code they need to write, resulting in cleaner and more maintainable codebases.
-
-
keycloak-policy-enforcer :
-
Purpose: The keycloak-policy-enforcer dependency is used in Java applications to enforce access control policies defined in a Keycloak server. It provides integration with Keycloak’s authorization services, allowing applications to restrict access to resources based on permissions and policies configured in Keycloak.
-
Usage: Integrate keycloak-policy-enforcer into your Java application to enforce access control policies defined in Keycloak. This involves configuring the policy enforcer to validate access tokens and enforce authorization policies, ensuring that only authorized users or clients can access specific resources.
-
4. Database
PostgreSQL
-
PostgreSQL is a powerful open-source relational database management system (RDBMS) known for its reliability, robustness, and extensibility. As a relational database, PostgreSQL organizes data into tables, each consisting of rows and columns.
5. Security and authentication
In modern software development, ensuring robust security measures is paramount to protect sensitive data and prevent unauthorized access. Authentication, the process of verifying the identity of users or applications, is a fundamental aspect of security. This section outlines the mechanisms employed for security and authentication within the Java project.
5.1. Mechanism
The security mechanism employed in this application is based on OAuth 2.0 and JSON Web Tokens (JWT). OAuth 2.0 is an industry-standard protocol for authorization, enabling secure access to resources without sharing credentials directly. JWT provides a compact and self-contained way to transmit information securely between parties as a JSON object.
5.2. Third party tools used
Keycloak
-
Keycloak serves as the Identity and Access Management (IAM) solution for this application. It provides robust authentication, authorization, and user management functionalities. Keycloak is integrated seamlessly with Spring Security, allowing for secure authentication and access control.
Integration steps
Integration with Keycloak involves the following steps:
-
Setting up a Keycloak realm.
-
Log in to the Keycloak admin console.
-
Create a new realm or use an existing one.
-
Configure clients, users, roles, and scopes according to your application requirements.
-
-
Configuring a client for the Java application
-
In the Keycloak admin console, navigate to your realm.
-
Create a new client for the Java application.
-
Configure client settings such as client ID, client protocol, and redirect URIs.
-
-
Adding Keycloak dependencies to the project
<dependency>
    <groupId>org.keycloak</groupId>
    <artifactId>keycloak-spring-boot-starter</artifactId>
    <version>{keycloak_version}</version> (1)
</dependency>
1 Replace {keycloak_version} with the appropriate Keycloak version. -
Implementing authentication and authorization
-
Configure Keycloak in your spring boot application properties.
-
Secure endpoints by specifying required roles.
-
Use Keycloak provided libraries or frameworks to handle authentication and authorization within your application code.
-
Integration endpoint: The application communicates with Keycloak via its integration endpoint, specifically utilizing the OpenID Connect protocol.
 security:
    oauth2:
      resourceserver:
        jwt:
jwk-set-uri: https://keycloak.solitx.io:8443/realms/Solitx2/protocol/openid-connect/certs (1)| 1 | JSON Web Key (JWK) set URI: The JWK set URI, configured below, is utilized by the application to retrieve the public keys used to verify JWT signatures. This ensures the authenticity and integrity of the tokens issued by Keycloak. |
Implementation details
The security configuration is managed through the ResourceServerSecurityConfiguration class. Key components of this configuration include:
-
Security filter chain:
-
Configured via spring security, the security filter chain defines the sequence of filters applied to incoming HTTP requests. This ensures that requests are processed securely, with authentication and authorization mechanisms enforced.
-
@Bean
public SecurityFilterChain securityFilterChain(HttpSecurity http) throws Exception {
    http.authorizeHttpRequests(authorize -> authorize
        .requestMatchers("/swagger-ui/**", "/v3/api-docs/**").permitAll()
        .anyRequest().authenticated())
        .oauth2ResourceServer(OAuth2ResourceServerConfigurer::jwt)
        .addFilterAfter(createPolicyEnforcerFilter(), BearerTokenAuthenticationFilter.class);
    return http.build();
}-
JWT decoder
-
A JWT decoder bean is defined to validate JWT tokens received from clients. This decoder utilizes the Nimbus library and retrieves the public keys from the JWK Set URI provided by Keycloak.
-
@Bean
JwtDecoder jwtDecoder() {
    return NimbusJwtDecoder.withJwkSetUri(this.jwkSetUri).build();
}-
Policy enforcer filter
-
An additional filter, ServletPolicyEnforcerFilter, is integrated into the security filter chain. This filter enforces authorization policies defined by Keycloak’s authorization services. Policies are dynamically resolved based on the request context, ensuring fine-grained access control.
-
private ServletPolicyEnforcerFilter createPolicyEnforcerFilter() {
    return new ServletPolicyEnforcerFilter(new ConfigurationResolver() {
        @Override
        public PolicyEnforcerConfig resolve(HttpRequest request) {
            try {
                return JsonSerialization.readValue(getClass().getResourceAsStream("/policy-enforcer.json"),
                        PolicyEnforcerConfig.class);
            } catch (IOException e) {
                throw new JsonParseException(e);
            }
        }
    });
}-
Access control
-
Access control is enforced at both the application and resource levels:
-
Application-level access: Certain endpoints, such as
/swagger-ui/and/v3/api-docs/, are configured to be accessible without authentication. This allows developers to interact with API documentation and other non-sensitive resources. -
Resource-level access: All other requests are subject to authentication and authorization checks. Only authenticated users with valid JWT tokens issued by Keycloak are granted access to protected resources. Additionally, access is further restricted based on the authorization policies defined in Keycloak.
-
-
6. Bitbucket repository
The project repository is hosted on Bitbucket, a web-based version control platform that utilizes Git for tracking changes to the source code. This section provides guidance on accessing, managing, and contributing to the repository.
Accessing the repository
To access the repository, appropriate permissions needed to be granted by the project administrators. Once granted access, follow these steps:
-
Clone the repository : Use the following command to clone the repository to the local machine:
git clone <repository_url> -
Authentication : Depending on your setup, you may need to authenticate with your Bitbucket credentials. Use SSH or HTTPS based on your preference and configuration.
Setup personal SSH keys on linux
Branching strategy
A branching strategy is followed to manage feature development, bug fixes, and releases effectively. The main branches in the repository are:
-
master : Represents the latest stable version of the project.
-
develop : Serves as the integration branch for ongoing development work.
-
feature branches : Created for new features or significant changes. Prefix feature branches with
feature/. -
bugfix branches : Created to fix bugs found in the development or production environments. Prefix bugfix branches with
bugfix/. -
release branches : Created for preparing releases. Prefix release branches with
release/.
Workflow guidelines
When working with the repository, adhere to the following guidelines:
-
Create feature branches : For each new feature or change, create a dedicated feature branch from the
developbranch. -
Commit frequently : Make small, logical commits with clear messages to track changes effectively.
-
Pull request process : Before merging changes into the
developormasterbranches, submit a pull request. Ensure code review and necessary testing are completed before merging. -
Resolve conflicts : In case of conflicts during merges, collaborate with team members to resolve them promptly.
Additional resources
For further assistance with Bitbucket features, refer to the Bitbucket documentation.
-
Bitbucket documentation
7. Liquibase
-
Liquibase is an open-source database schema change management solution which enables you to manage revisions of your database changes easily. Liquibase makes it easy for anyone involved in the application release process to:
-
Eliminate errors and delays when releasing databases.
-
Deploy and roll back changes for specific versions without needing to know what has already been deployed.
-
Deploy database and application changes together so they always stay in sync.
-
-
After you Install Liquibase on your Windows, MacOS, or Linux/Unix system, you can get started with SQL, XML, YAML, and JSON changelogs.
-
Install liquibase
-
Configuration
-
In our project, Liquibase is configured via the
liquibase.propertiesfile located in the project’s root directory.
-
Database connection
Liquibase requires database connection information to perform schema changes. In our project, the following connection details are specified:
-
URL:
jdbc:postgresql://localhost:5432/solitx_v3 -
Username:
ariadne -
Password:
aswindia
Change log file
Example file
databaseChangeLog: (1)
  - include:
      file: PROFILES/master.yaml (2)
      relativeToChangelogFile: true

  - include:
      file: PRODUCTS/master.yaml (2)
      relativeToChangelogFile: true

  - include:
      file: CONTRACTS/master.yaml (2)
relativeToChangelogFile: true| 1 | The change log file specifies the sequence of changes to be applied to the database schema. In our project, the change log file is named solitx-changelog.yaml and is located in the classpath under the src/main/resources directory. |
| 2 | Within the changelog file, there are paths to files that correspond to changesets for every table in the database where updates occur. |
Example file
databaseChangeLog:
  - changeSet:
      id: contracts
      author: ****

  - include:
      file: 1_create_contracts_table.yml (1)
relativeToChangelogFile: true| 1 | Here is an example of contracts master.yml file which again leads to the yml file of create contracts table: |
Example yml for create contracts table
databaseChangeLog: (1)
- changeSet: (2)
    id: create-table-contracts
    author: ********
    labels: contracts
    comment: creating contracts table
    changes:
    - tagDatabase: (3)
        tag: v0004.0
    - createTable:
        tableName: contracts
        columns:
        - column:
            name: contractuuid
            type: uuid
            constraints:
              nullable: false
              primaryKey: true
              primaryKeyName: contracts_pkey
        - column:
            name: productid
type: bigint| 1 | This is the root element of the YAML file, indicating that it contains a changelog for a database. |
| 2 | This is a specific change within the changelog. Each changeSet typically represents a single atomic change to the database schema. |
| 3 | This change tags the database with a specific version (in this case, "v0004.0"). This is often used for versioning or tracking purposes. |
Liquibase runtime settings
The liquibase runtime settings specify additional configurations required for Liquibase operation. In our project, the following settings are defined:
-
Driver:
org.postgresql.Driver -
Classpath:
lib/postgresql.jar
The classpath points to the location of the PostgreSQL JDBC driver, which is necessary for Liquibase to connect to the PostgreSQL database.
|
Additional notes
|
url: jdbc:postgresql://localhost:5432/solitx_v3
username: ariadne
password: aswindia

# Change log file location
changeLogFile=solitx-changelog.yaml

# Liquibase runtime settings
driver=org.postgresql.Driver
classpath: lib/postgresql.jar
8. Logging
What do the loggers do
In software development, logging refers to the process of recording events that occur during the execution of a program. Logging is crucial for understanding the behavior of an application, troubleshooting issues, monitoring performance, and maintaining software integrity.
The org.slf4j.Logger interface, provided by the Simple Logging Facade for Java (SLF4J) framework, serves as a crucial component for logging in Java applications. It offers a unified API for logging messages at various levels, such as debug, info, warn, and error.
Developers can use org.slf4j.Logger to log messages, format log entries, and handle exceptions effectively.
What logging framework is used
SLF4J acts as a logging facade, providing a layer of abstraction that separates the application code from the underlying logging implementation. This decoupling allows developers to switch between different logging frameworks (e.g., Logback, Log4j) without modifying the application code.
Integration with SLF4J involves adding a binding to a specific logging framework, which provides the actual logging functionality. SLF4J bindings enable org.slf4j.Logger to be seamlessly used with preferred logging frameworks.
Usage example
@Override
	public Response<PaymentChannels> createExternalProfilePaymentChannel(ExternalPaymentChannelDTO paymentChannelData) {
		log.info("Creation of external profile payment channel started by userID : {}, request : {}",
				usersHelper.getUserID(), paymentChannelData); (1)

		final Map<String, Object> paymentChannelMap = mapper.convertValue(paymentChannelData, Map.class);

		validator.checkOwnerID(paymentChannelData.getOwnerID(), paymentChannelData.getIdentifier());

		// Set up an external payment channel for the user profile using the provided
		// data
		PaymentChannels paymentChannel = paymentChannelHelper.setExternalProfilePaymentChannel(paymentChannelMap,
				paymentChannelData);

		paymentsRepo.save(paymentChannel);

		log.info("Creation of external profile payment channel completed by userID : {}, request : {}",
				usersHelper.getUserID(), paymentChannelData); (2)
		return new Response<>(HttpStatus.CREATED.value(), "Payment channel created successfully", paymentChannel);
}| 1 | Logs the initiation of the creation process for an external profile payment channel.
|
| 2 | Logs the completion of the creation process for an external profile payment channel.
|
Best practices
-
Consistent logging levels: Use appropriate logging levels (debug, info, warn, error) based on the significance of the logged events.
-
Parameterized logging: Utilize parameterized logging to improve performance and readability, especially for complex log messages.
-
Configuration: Configure logging levels, appenders, and formatting according to the application’s logging requirements.
-
Error handling: Handle exceptions gracefully and log relevant information to aid in debugging and troubleshooting.